Recovering a bricked Netgear AC1450 router
Several years ago, when 802.11AC WAP's were quite expensive, I purchased the "Costco" version of the Cisco AC1750 that literally had the same internals (including the same FCC regulatory assignments) but was branded as a Netgear AC1450 and the speed was artificially limited.
I usually replace the firmware on all my WAP's/routers with DD-WRT or Advanced Tomato to avoid running the (usually) horribly insecure built-in firmware that comes with the device. This was no exception, however at the time of this mod the AC1450 wasn't natively supported by DD-WRT yet. The AC1750, which had the same internals however, was. The first step was to convert my AC1450 into an AC1750 (Also known by R6300v2), then hopefully replace the firmware with that of the stock AC1750, and finally replace it with Advanced Tomato.
Since most of this guide will actually be about undoing these changes, I'm just going to link to an excellent guide that I was able to follow along with for the conversion. Upgrade A Netgear AC1450 Router to AC1750 (R6300V2). To summarize, you will be enabling Telnet using a special debugging application which will allow you to burn a different board ID onto the system (thus replicating the AC1750). After this step, you can then upgrade the firmware through the web UI to that of an AC1750 (R6300v2). After this step you proceed with installing the "initial" DD-WRT base firmware, and then the full DD-WRT firmware (Or Tomato).
As mentioned above, this guide will actually be about undoing these changes or recovering a bricked router from this series. Shortly after I performed the above hack, native support for the AC1450 was added into DD-WRT and it was discovered that converted boards were actually having stability and wireless issues. Somehow I bricked my router by flashing to DD-WRT then directly to Tomato. The cause of this issue has to do with the way both firmwares handle reading the administrator password stored in NVRAM, however none of the 30-30-30 techniques worked anymore for wiping the NVRAM... I tried all the suggestions talking about holding down the WPS button as well to no avail.
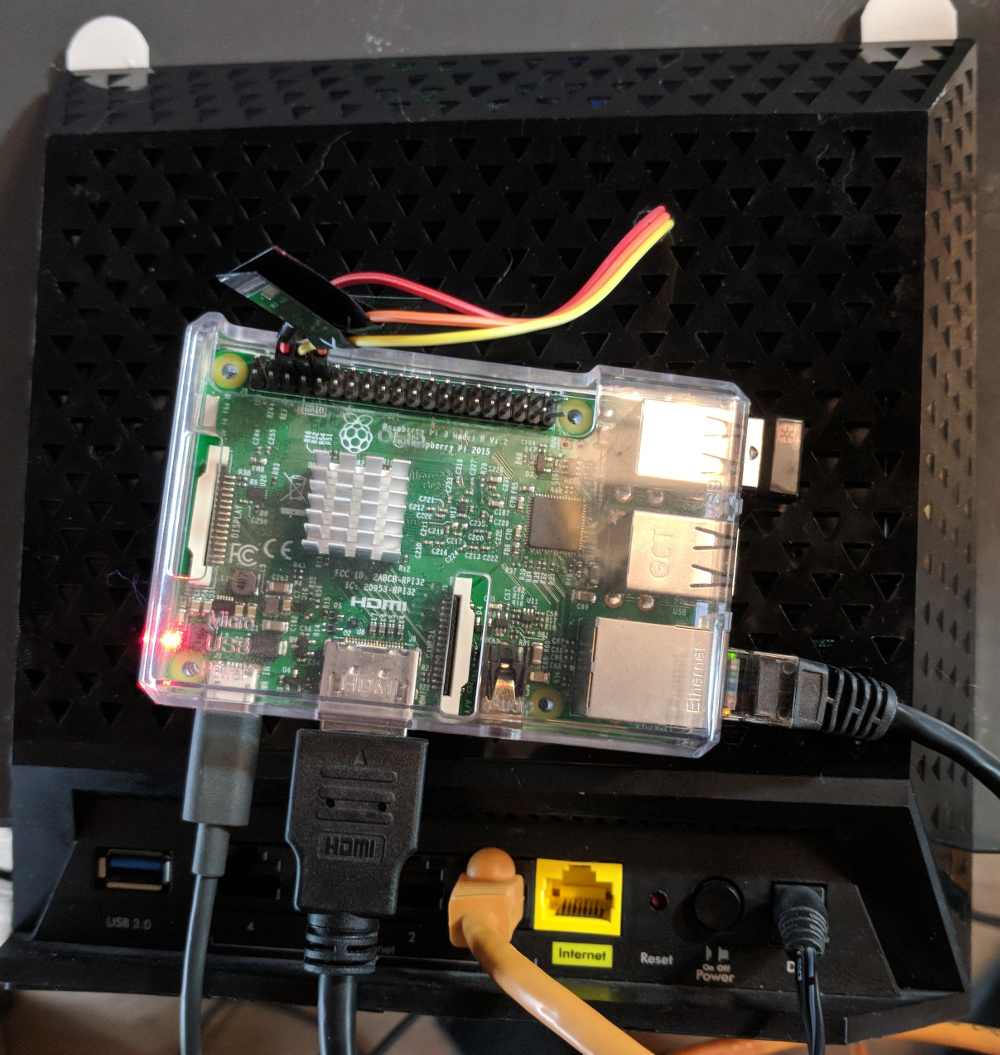
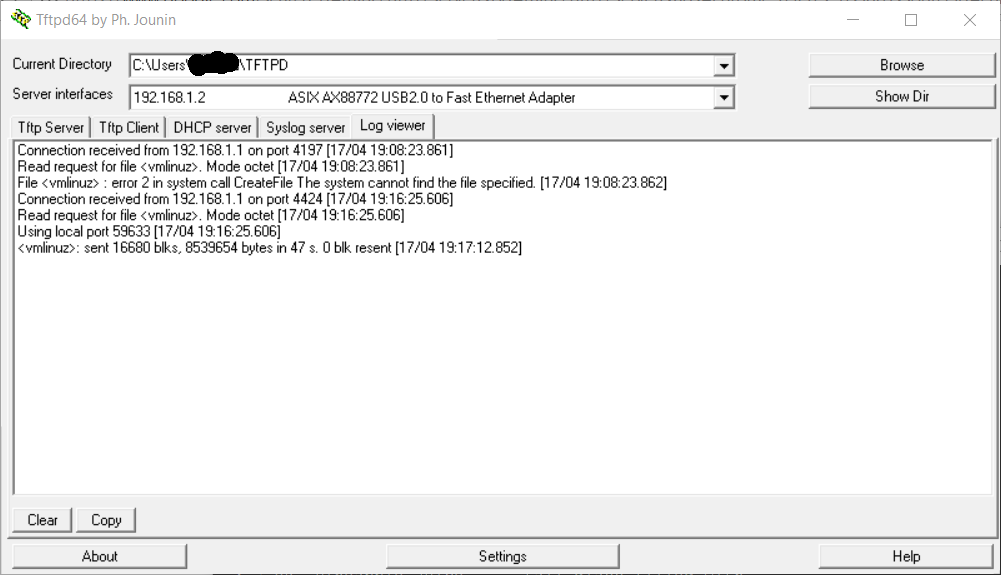
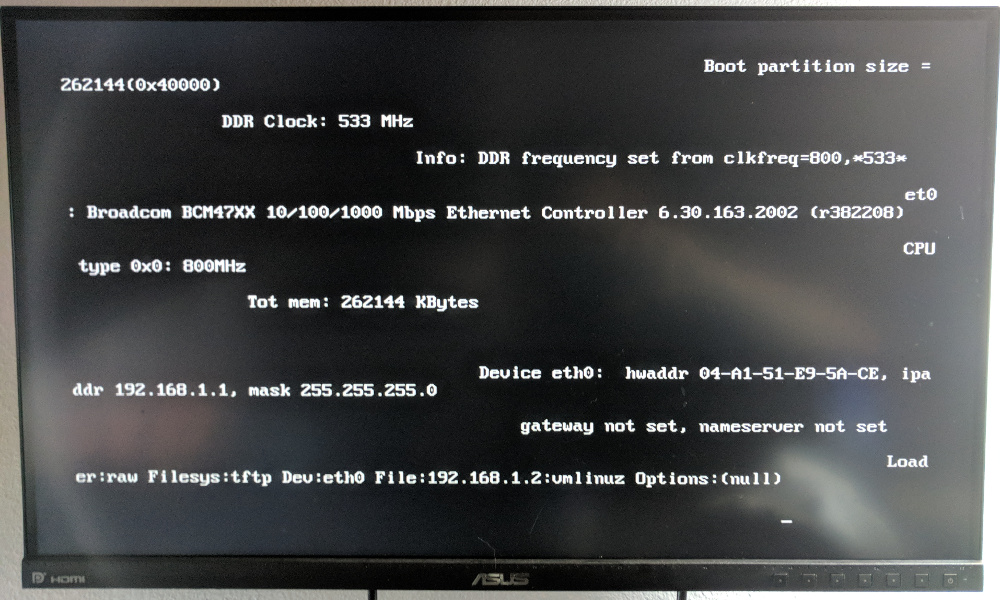
At this point I had no method of access to connet to this thing, however I wondered if it had internal UART pins... It does! I was able to hook up my Raspberry Pi 3 to the GND/RX/TX pins on the motherboard and view the boot process by connecting to the serial console over the "screen" application. After watching the process and doing some research, I found that the router will search for a vmlinuz file being served via TFTP from a client connected to the LAN port with an IP address of 192.168.1.2. I was lucky enough to find that someone else had already built an Open-WRT vmlinuz file that was compatible with this model and I hosted it via TFTPD32. Once the router finishes downloading and booting the newly uploaded temporary firmware, you will want to browse to the default IP address of the router (192.168.1.1) and login to Open-WRT using root:admin.

Once you have verified that the router has booted Open-WRT, connect to the router using SSH with the root:admin credentials and issue the following commands, which will wipe your entire firmware placing the device into a state that will allow it to accept any firmware image due to the corruption. The commands are "mtd erase nvram" and "mtd erase firmware" and then "reboot".
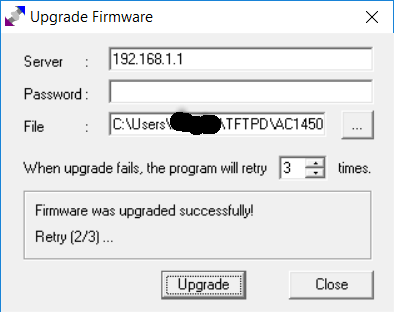
At this point we will use the DD-WRT coded tftp2.exe. Launch the application and set the server IP field to that of the router (192.168.1.1), with no password. For the firmware you will want to host the factory image from Netgear for the AC1450, but NOT the latest version (As that has the recent lockdown requirements from the FCC that prevent replacing the firmware). I used the firmware titled "AC1450-V1.0.0.6_1.0.3.chk".